
|
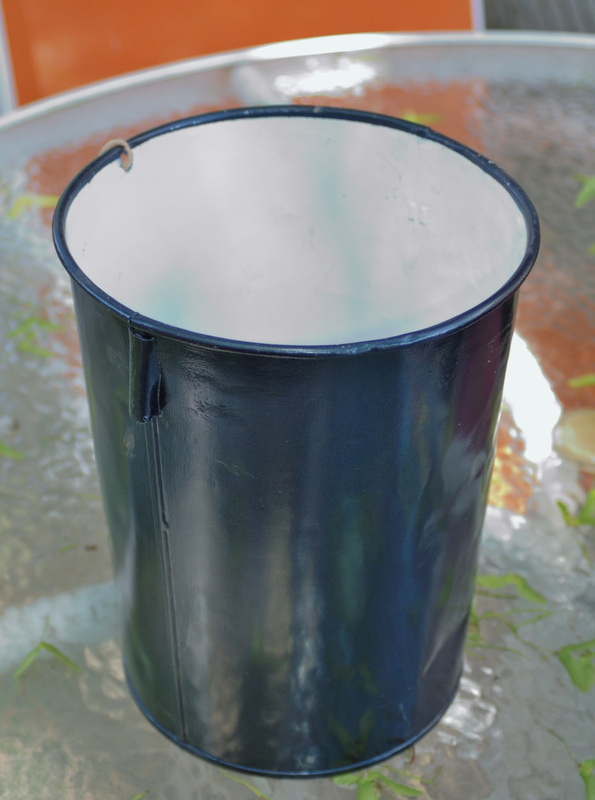
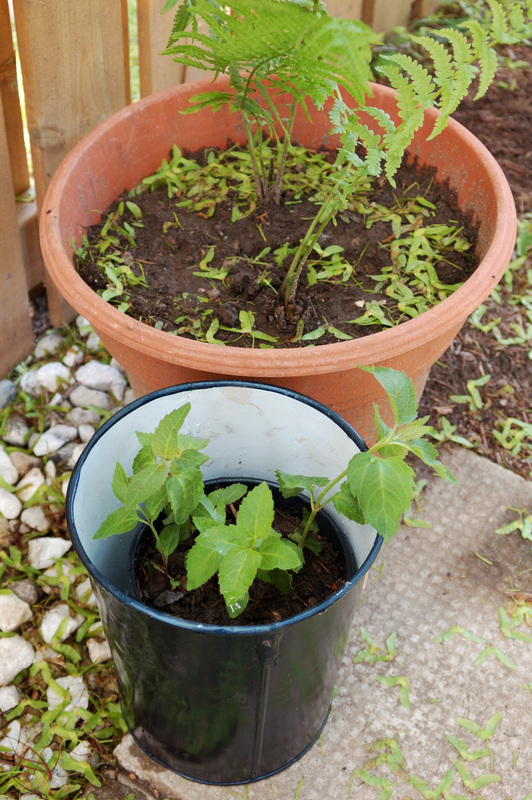
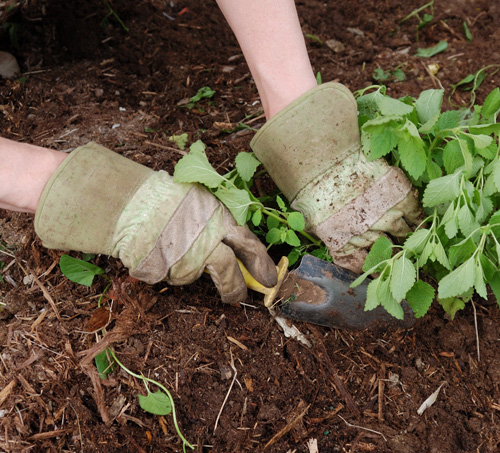
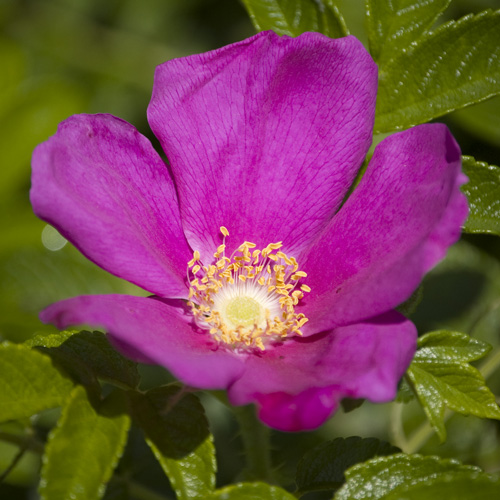
6/12/2013 More Garden Container Ideas to Save You Money and Make a Uniquely Beautiful Patio GardenRead NowIn my last post, I introduced some ideas for turning household items into garden containers. In a similar vein, I'll show you some ideas in this post for repurposing second hand finds as plant pots. For a reminder about what you should look for in a garden container, read my previous post about repurposed garden containers. Where to Find Garden Containers: The Antique Store Antique markets and shops provide lots of interesting options for garden containers, often at a reasonable price. When you search antique stores, give yourself lots of time so your imagination has ample time to wander (and so you can hunt for a good bargain). 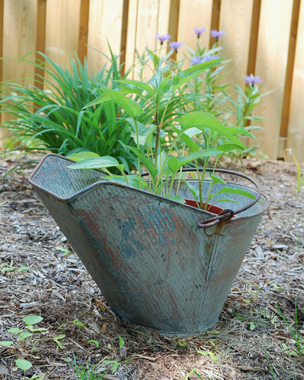 This is an old coal bucket in which I've set a plastic plant pot full of purple coneflower (echinacea). I didn't actually find this at an antique store: it was sitting in a corner of our garage when we moved into our house . . . another treasure left behind by the previous owners. But I have seen many of these at antique stores, usually at a decent price. This container has ample room for a good sized plant. And I love the visual interest that the shape of the coal bucket adds to the garden. Here's an antique store find that I got for $8: an old sap bucket, once hung on a maple tree to collect sap for making maple syrup. It's nice and deep, and of course more than able to stand up to the elements. Because it's such a deep container, I have used it to house a tall perennial, false sunflower, which gets lovely yellow flowers later in the summer. The yellow flowers will look gorgeous with this blue container, and I love it that I have something so iconically Canadian in my garden.
Where to Find Garden Containers: Second Hand Stores and Garage Sales You can often find used flower pots, window boxes and garden containers at second hand stores and garage sales. But if selection is scarce for traditional garden containers, look for something out of the ordinary or eclectic: buckets, colanders, stock pots, camping dishes, crockery . . . heck, even an old wagon would be a great thing for vessel for potted plants. 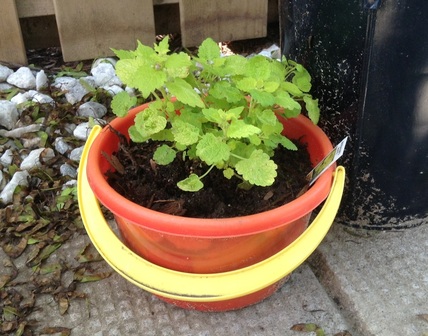 I found this cute sandbox/beach bucket at a second hand store and knew right away it would be a perfect plant pot. I poked some holes in the bottom of the pail and planted some golden spotted lamium in it. I'm pretty stoked about how amazing this lime green lamium looks in the orange and yellow pail. The vibrant colours some playfulness to the patio. These ideas just scratch the surface of what you can use to pot up your plants. Let yourself explore, and I know you'll enjoy the surprising and eclectic results.
0 Comments
 photo, landscapingnetwork.com photo, landscapingnetwork.com A few weeks ago, I wrote about my plans to grow some perennials in pots in the areas of my yard where it's difficult to plant anything. I haven't spent a cent yet on the plants for my potted perennial plans: so far I've been able to use divided plants and seedlings from my own garden and those of my friends. The trickier - and potentially more costly - part of this plan is finding the containers themselves. Containers and planters from garden centres and home stores are beautiful, but they can be pricy (and heavy!). So, I've had to come up with some free and low cost solutions to work within my budget. And really, I'm happy to do it. My perennial pots might not be super cohesive or colour coordinated, but they'll have lots of character. In my next two blog posts, I'll fill you in on some ideas I'm trying that might also work in your garden. What to Look for in a Garden Container There are three main qualities to consider when looking for a container for potting perennials:
Where to Find Garden Containers: Around the House and Garage Your kitchen, basement and garage are excellent sources for garden containers. You might have some old pots and pans in the back corners of your kitchen cupboards or some wicker baskets in the basement. In the garage, you might have an old watering can, an old bucket, or even and old wheelbarrow. Just use your imagination. 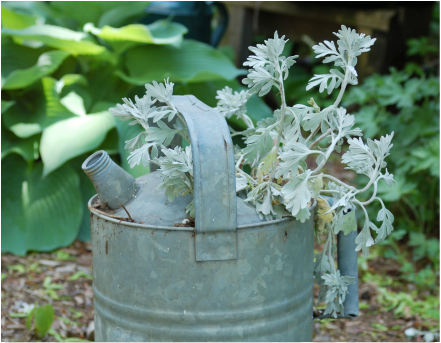 This old steel watering can was left in our garage by the previous owners of our home. And I very much appreciate that they did. I used the watering can for a couple years until it leaked more than it poured. It has a small opening, but it makes a lovely garden container for traily plants that can cascade over the sides of the container. And it's nice and deep for all those roots. This week, I divided some silver brocade artemisia (sweet wormwood) from my front garden and put some of it in this old watering can in my backyard garden. 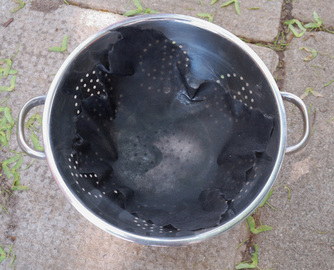 Here's another idea you might have come across on Pinterest or Flickr - as I did: a colander makes a perfect planter because it definitely has ample drainage. And it's cute too. This metal colander doesn't come from my own kitchen, but I got it at a garage sale down the street for a quarter! I lined it with a piece of landscaping fabric, just to prevent any soil from draining out. I transplanted some lamium (deadnettle), which is a beautiful ground cover plant, so I thought it would do well in this wide container. Et voila! I really love how it looks staggered with other planters on my patio. (Now if I could only stop our maple tree from dumping so many maple keys all over everything.) In my next post, I'll give you some ideas for second hand finds that you can turn into garden containers. 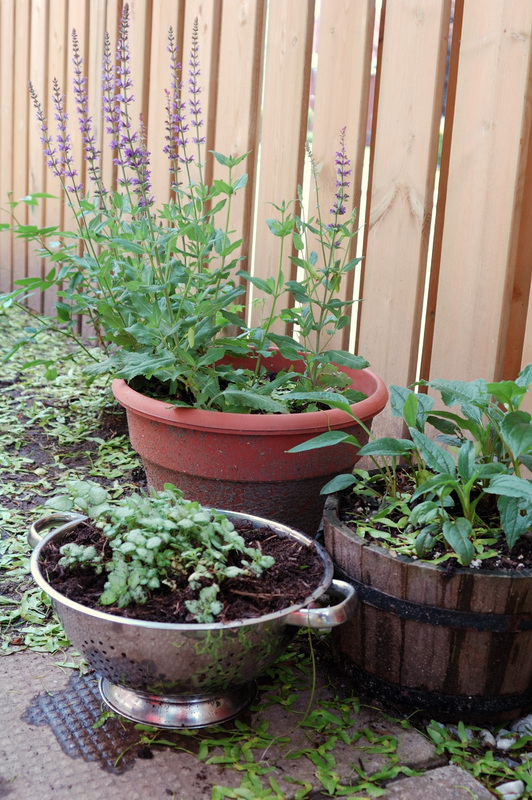
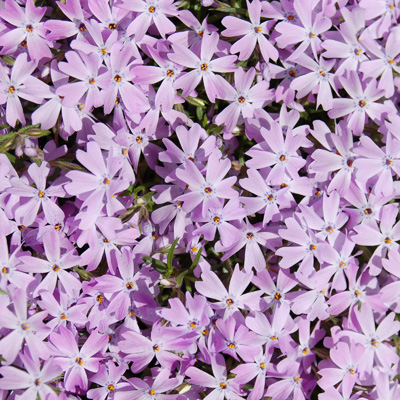
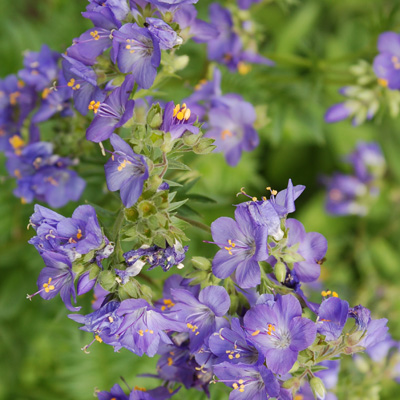
potted perennials: (l-r) lamium (deadnettle), blue sage, coneflower (echinacea)
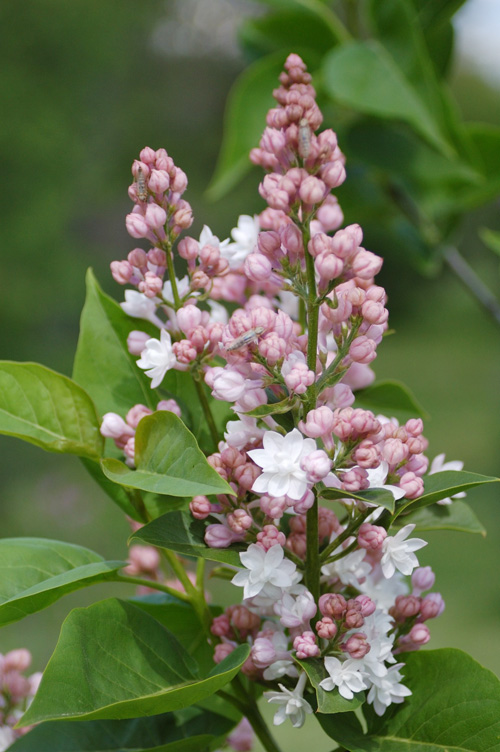
Spring is finally here! . . . at least, where I live in southern Ontario (Zone 6a). At this time of year, as excited as I am to get going on gardening, I always forget what I should be doing in the garden: what needs to be pruned when, what should be fertilized, what can be moved and what can't, etc. This year, I'm writing things down in a new garden journal I got from my excellent-gift-giving husband, Dan. (For Christmas and my birthday - both in the dead of winter - he often gets me gardening stuff, which is always a treat.) So I thought I'd share a few of the spring gardening tips I've collected in various places and written down:
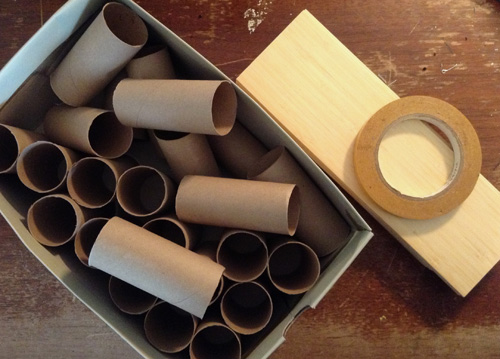
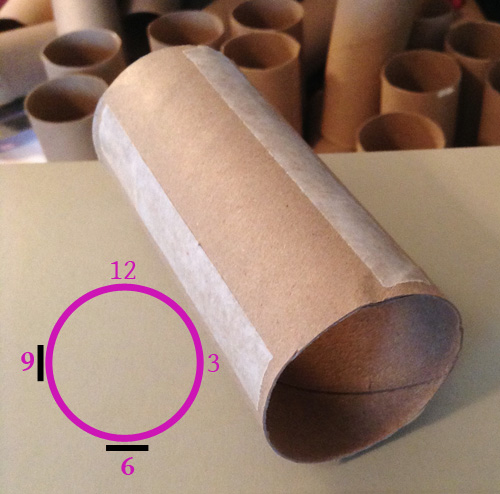
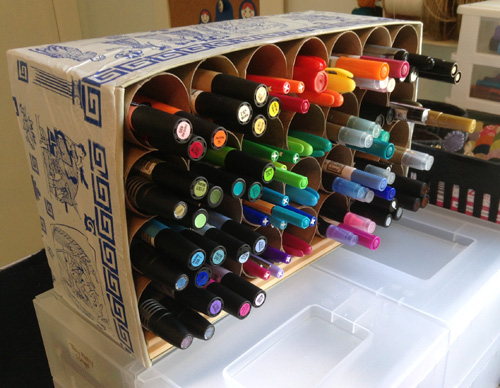
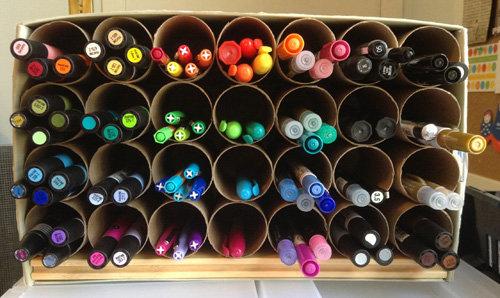
4/24/2013 Tubular Tutorial: Create a Craft Organization Station with Recycled Toilet Paper RollsRead NowMy new favourite discovery is the virtuous versatility of the toilet paper roll. This sturdy paper tube is handy for so many things, and I find myself using it more and more in my studio to organize art and craft tools. My newest endeavour is an organization station (yes, I'm rhyming on purpose) for all my markers - made with 28 recycled toilet paper rolls - and I thought I'd tutorialize the process for those of you who could benefit from some colourful tidiness.
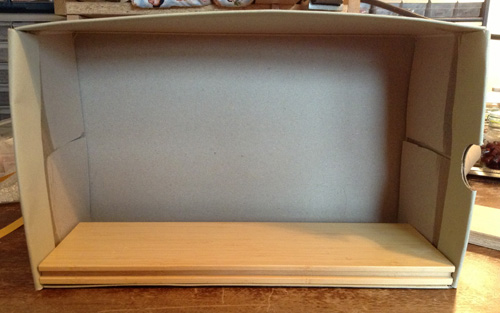
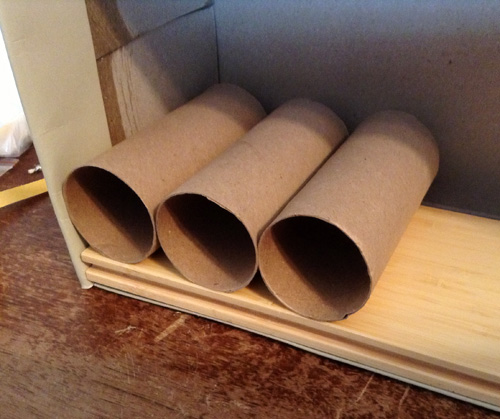
I set my end piece of hardwood flooring inside the long side of the shoe box. If you have no room to set your weighting inside, just adhere it to the bottom of the box.
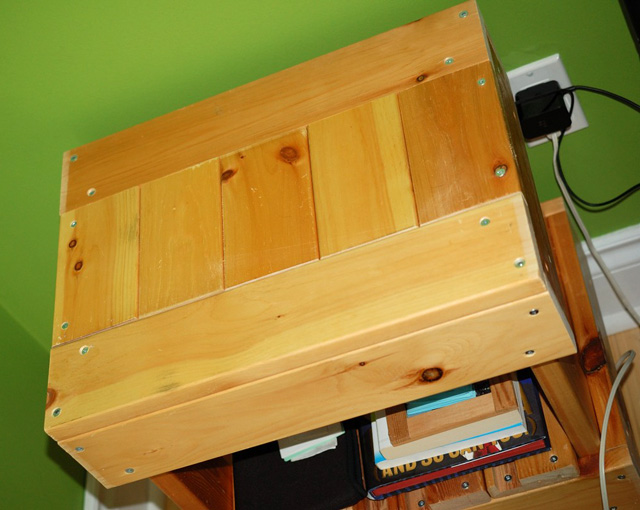
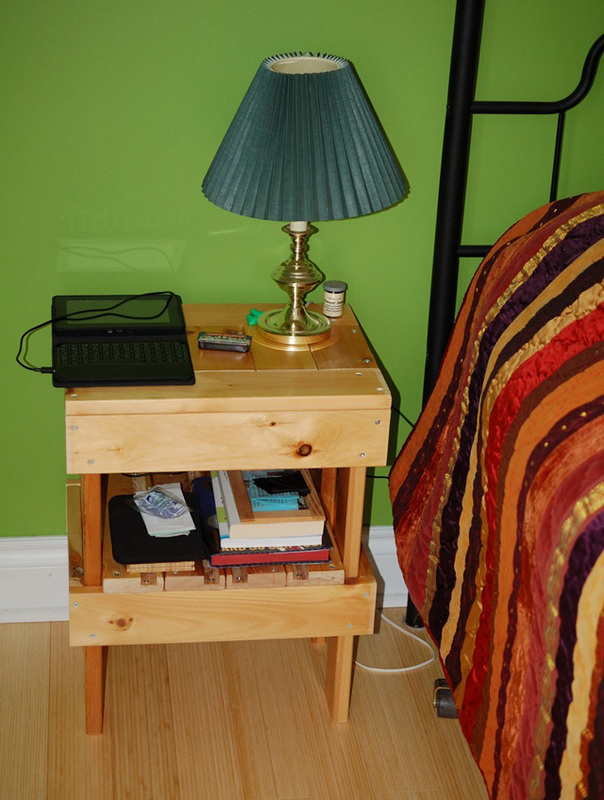
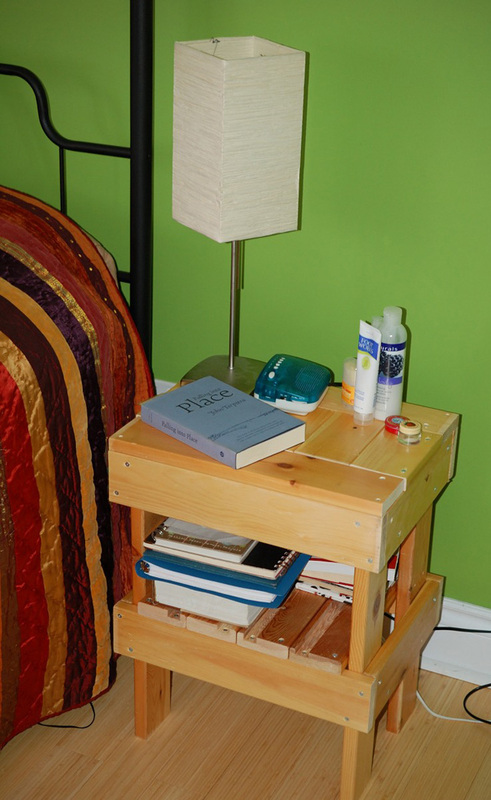
A year ago, my husband, Dan, and I bought a comfy new couch to replace an old pine futon we had inherited from friends many moons ago. The futon sat in the basement for a while as we avoided figuring out what to do with it, until we finally got tired of maneuvering around it and had to decide its fate. Unfortunately, the mattress went to the dump . . . it's pretty hard these days to find anywhere to donate a used futon mattress, and I was too overwhelmed by the thought of trying to upcycle it. But I knew there were tons of things I could do with all that pine from the futon frame. So Dan obliged my whim and kindly dismantled the frame for me. He's so great. A couple months ago, an upcycling project dawned on me for the futon frame wood: bedside tables. For our entire married life, our bedside tables have consisted of whatever we have found around the house that can hold a lamp and an alarm clock. I've never done any real carpentry, but I thought I'd use the futon wood to try my hand at building something a little more spiffy for our bedsides. And hey, I'm always stoked about any opportunity to play with power tools. 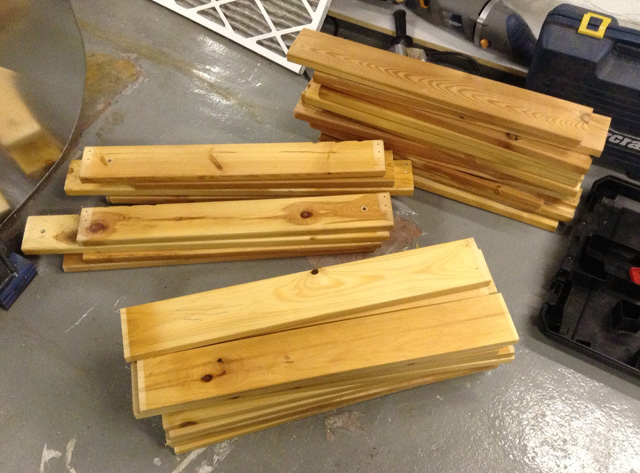 My first step was to sort out all the pieces of the dismantled futon to see if I would have enough wood for two tables. I did! Then I had to remove the staples that had been used in the construction of the original futon. They came out easily with pliers. Here are my pieces of wood, organized and ready to go. 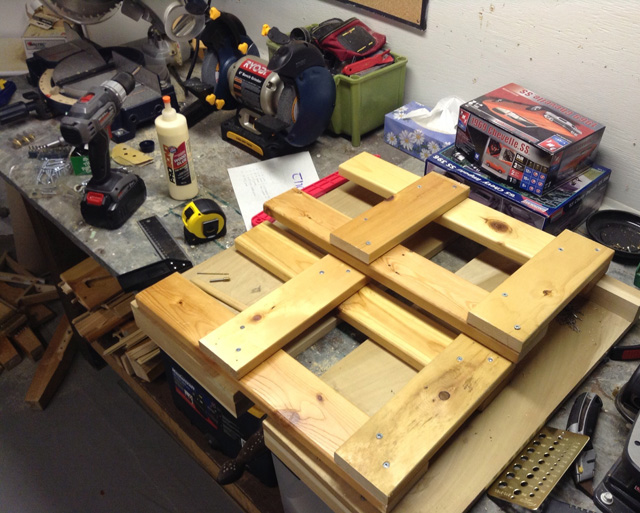 As a carpentry novice, I needed a simple table plan to follow. I'm definitely not smart enough to figure it out by myself. I searched online and found this simple, excellent plan for a plant stand made from a recycled wood pallet. I adjusted it slightly for my rectangular tables, but the instructions were just what I needed. Here are the beginnings of my tables: the side legs. If you look very closely, boys and girls, you can see the tools I used: compound mitre saw (at the top left of the picture), drill, wood glue, tape measure, right angle thingy, countersink bit and drill bits. Oh, and screws of course. 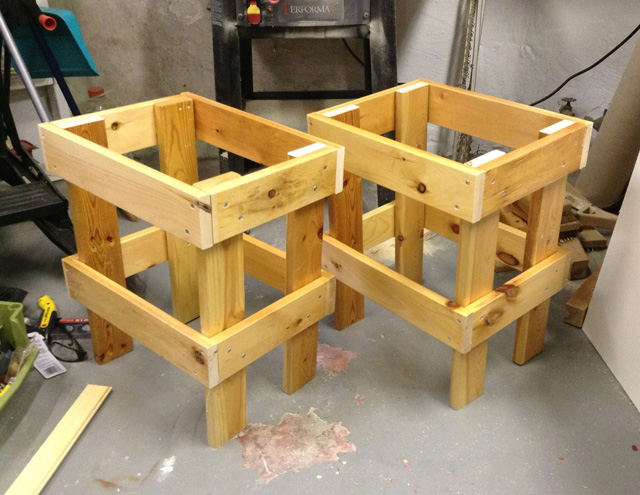 Soon my cutting and measuring started to look like tables, and to my delighted surprise, they didn't even wobble! It was at this stage that I decided I would leave the tables unpainted: I like the rough quality of the pine and the curious dings and holes that show the wood's original purpose. And here's the finished product: sturdy tables with shelves underneath for books and stuff. I'm thrilled with the results. I love the fact that I have some upcycled furniture that's truly functional, that I made myself. Furniture that has served our home continues to serve us in a new way.
For years now in my own home, I've been trying to replace conventional cleaning products with less harmful products. The phosphates and surfectants commonly used in conventional cleaners are terrible for our water system, and I doubt they're good for me. Thankfully, increasing consumer demand for environmentally friendly cleaning products has made safer alternatives more available. What I've noticed, though, is that, as more products become available, it gets harder to determine which products are legitimately environmentally friendly. There's lots of pretty blue-and-green-with-fluffy-clouds packaging out there, but to be really sure you're getting a safe product, you have to read the ingredients carefully and know what you're looking for (or not looking for). In my experience, legit environmentally friendly cleaning products are a little more expensive than their conventional counterparts. In many cases, I'm willing to pay. I've also begun to realize, however, that I can take some matters into my own hands with natural ingredients I have in my kitchen cupboards. And my latest favourite discovery is the one I rebelled against as a kid each time my Mom asked me to clean the bathroom.
I got most of these ideas from an early incarnation of the Reader's Digest book Extraordinary Uses for Ordinary Things, which I picked up at a used bookstore years ago. It's a very handy book and lists a zillion other uses for vinegar.
Now, I'll admit: cleaning with vinegar doesn't smell awesome, and I definitely crack a window while I'm cleaning. But I so much prefer it to the cough-inducing scents and mysterious nasty air particles left by commercial cleaning products.
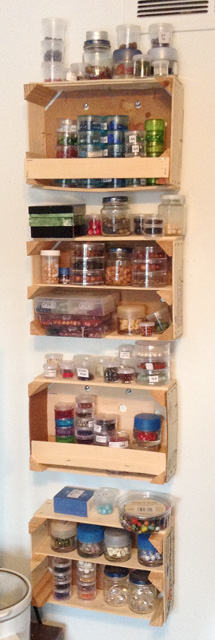
(I saved the thick wire staples for another project.) I also used the dismantled crate pieces to add extra shelving to some of the crates. Hopefully the photo gives you an idea of some of the things I did. As you can see, my little orange crate shelving system has allowed me to store a lot of beads! And I get a kick out of the fact that my studio has some upcycled storage.
I have used orange crates in other ways for studio organization, but I'll save that for another day. I don't want you to get over-excited!
|
Jane Hogeterp Koopman

Subscribe to Jane's Blog by RSS or email:
Categories
All
Archives
January 2018
Stuff I love:
|
 RSS Feed
Proudly powered by Weebly